Because of a lightning strike that fried my internet modem, i had to postpone this update a couple of days. I had 2 free days to (re)build my printer, and i took advantage of it.
The next step in the project was inserting the vertical extrusions. Initially it seemed to went pretty well, but then the shit hit the fan.


With all that finally in place it was time to start installing the moving parts. The steppers:

And the carriages:


At this point, i had put over 10 building hours in this kossel, including the time taking it all apart and putting it back together again. not bad for a first time building in my opinion.
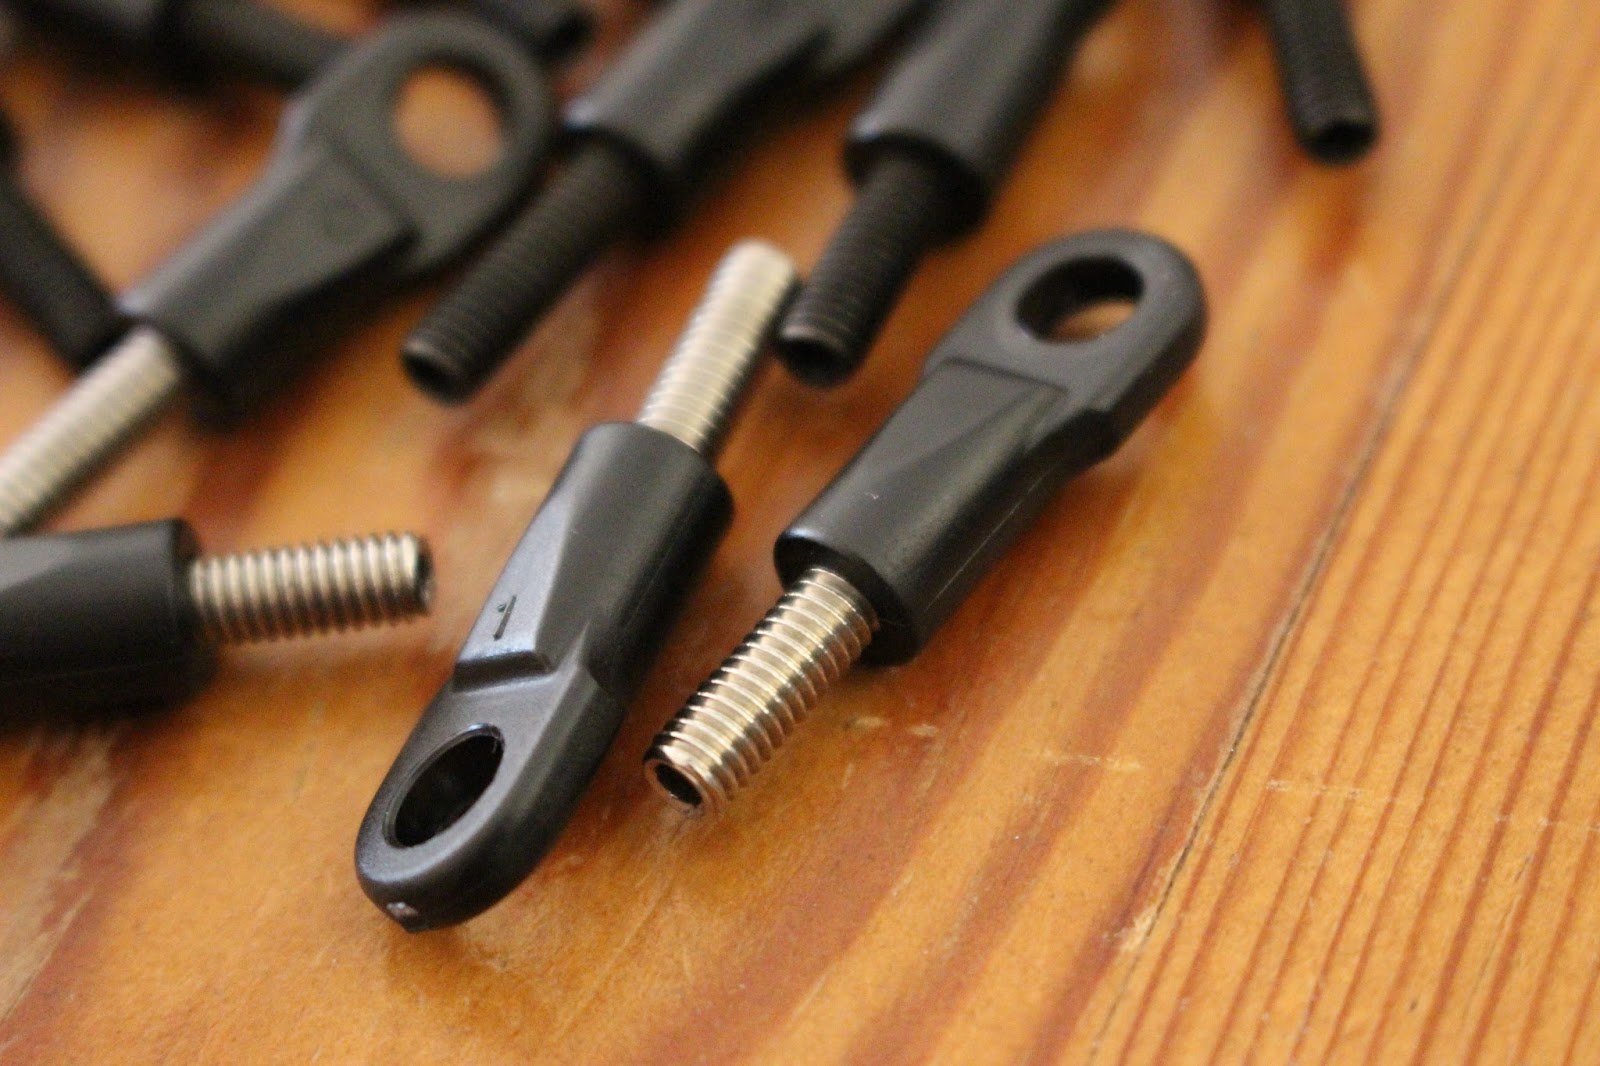
According to the manual the next step was putting the pushing rods together. This proved to be a problem as i discovered that the carbon rods were not threaded (seems to be common knowledge or something), and i have to epoxy the rod ends in.
I don't have epoxy, and i have no experience in using it, so i postponed this step.

The last step that i attempted this weekend was installing the top. That didn't went without a little problem:

I attempted to repair them with instant glue. put them on again, and they broke again. In the end i decided to just place them and i added glue as reinforcement after correctly positioning them. I'll try to get the printer running, and as a first project, print some replacement top corners.
I got a little confused by sintrons' belt tensioning system. The manual talks about it, but there are no parts to create it. I went for it and used some old washers that i had lying around to create my own belt tensioning system, but i don't think this kit intends to let you use one...
altogether i'm satisfied with the progress. it starts to look like a delta now, just without the effector. that will take more time to build than i anticipated.
No comments:
Post a Comment